Gravity. Noted MIT-graduate engineer, statistician, author, and entrepreneur Roger Babson labeled, in 1929, gravity “Our enemy number one.” When it comes to aging, that actually may be true.
Gravity, over time, causes skin to sag. The naturally perky breasts and butts of youth need pushups and squats to keep from drooping. But just as exercise can help keep gravity from ravaging your body, it can also help keep your face firm and toned.
Try these yoga-based exercises for a natural facelift effect. If you’re short on time, skip right to #11.
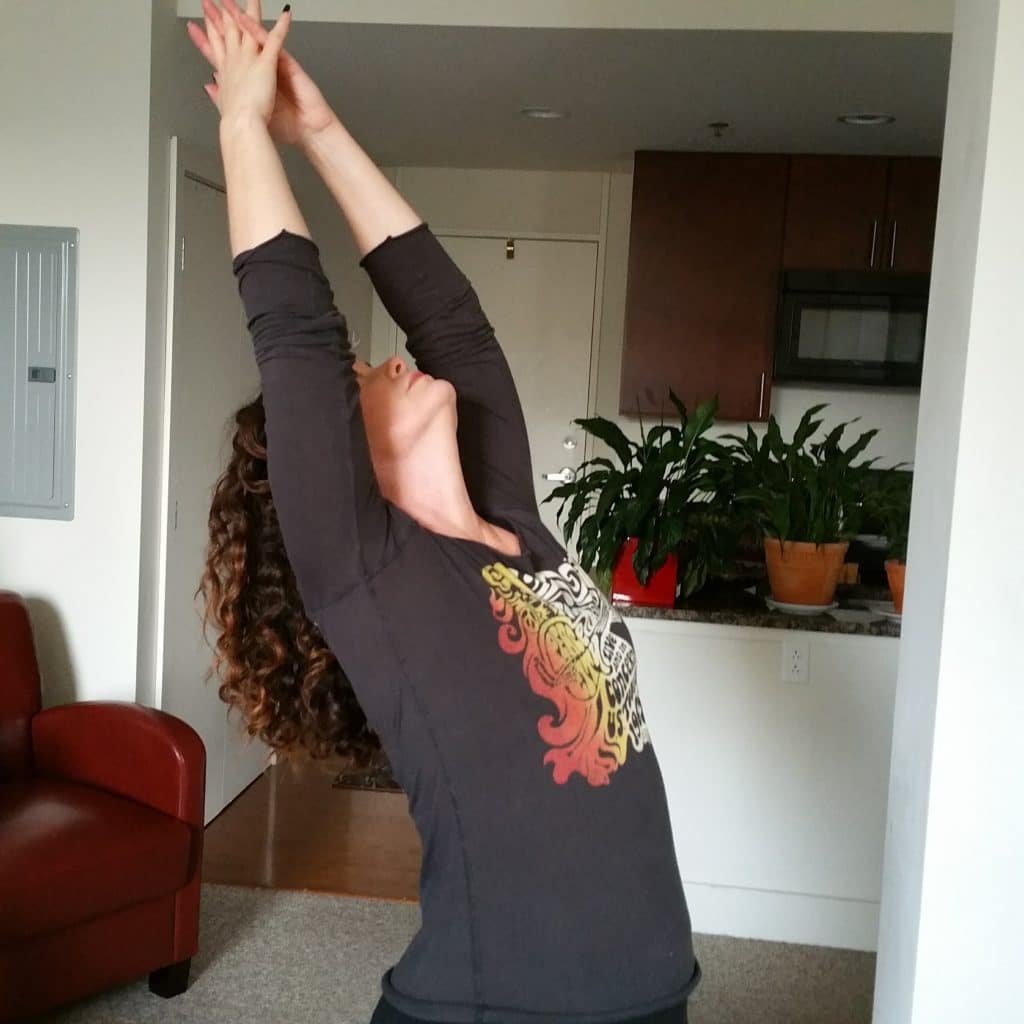
- Standing with your feet close together in the middle of your yoga mat and your arms down by your sides, inhale your arms up over your head bringing your palms together. Look back slightly allowing your shoulders to open, your neck to stretch, and your hips to push forward just a tiny bit.
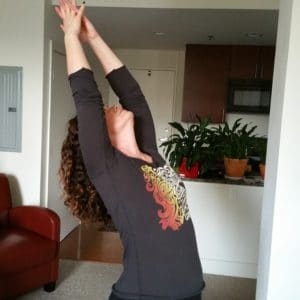
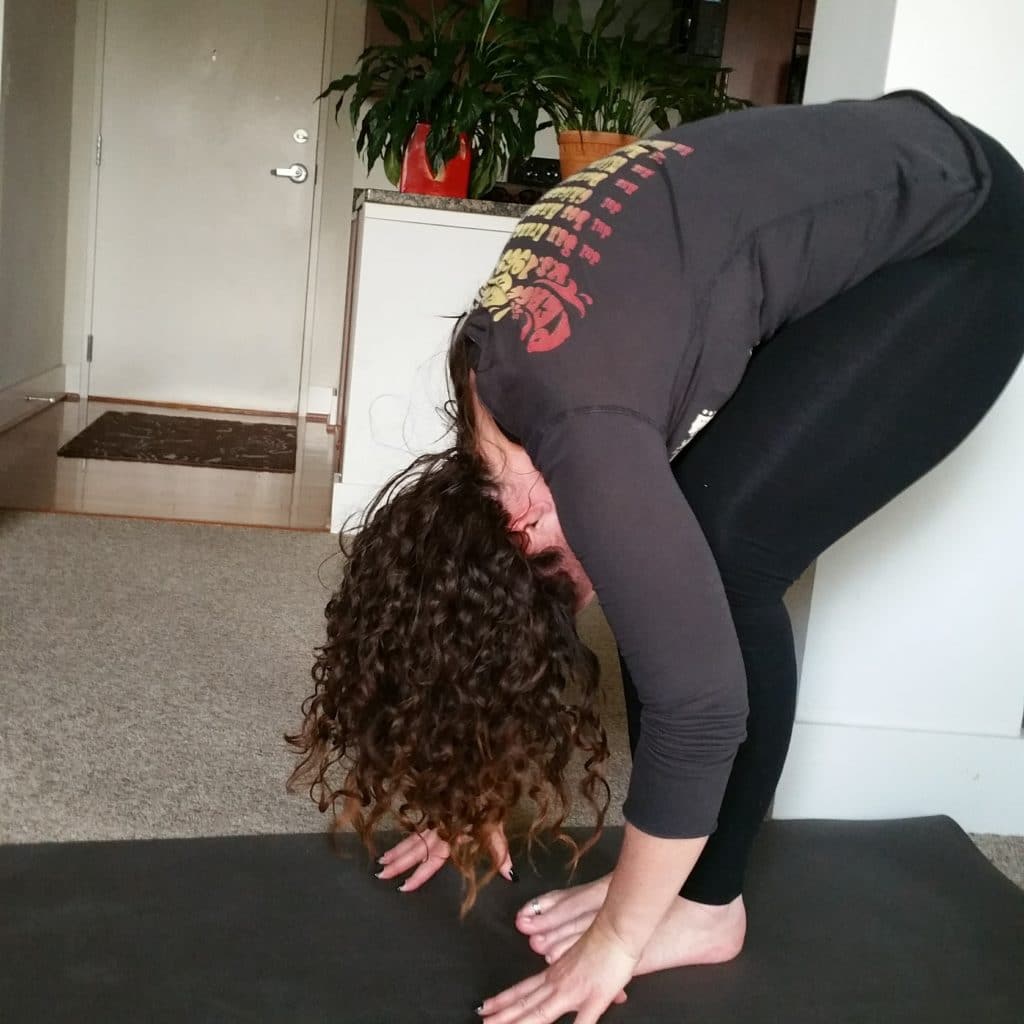
Slight backbend to begin your sun salutation. - Exhale and fold forward. Bend your knees and place your palms on other side of your feet. Pull your belly button towards your spine to engage your abdominal muscles.

Forward Fold. Soften your knees and bring your head towards your shins. - Inhale and step your left leg back into a low lunge, keeping your hands where they are. Look up and feel the stretch along your neck and chin. You will also feel a stretch along your left quad and your right inner thigh.
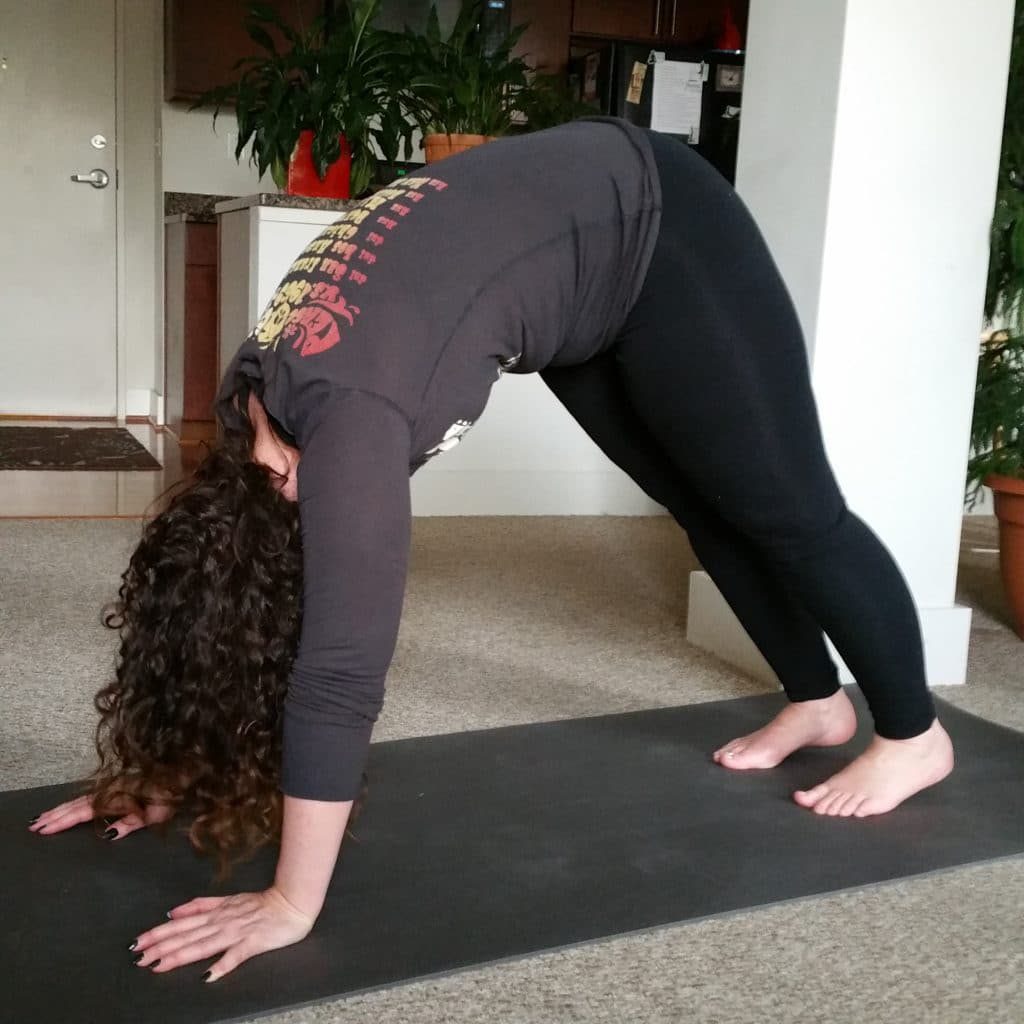
- Exhale and step your right leg back to meet your left leg. Separate your feet slightly and push gently into downward dog. Stay in downward dog for 3 deep breaths in through the nose and out through the nose.

Downward Dog. Arms shoulder width apart. Engage your core by pulling your belly button towards your spine. Press heels towards your mat. - On your 3rd exhale, lower your body through a push up position so that the tops of your thighs and abdomen are on the mat.
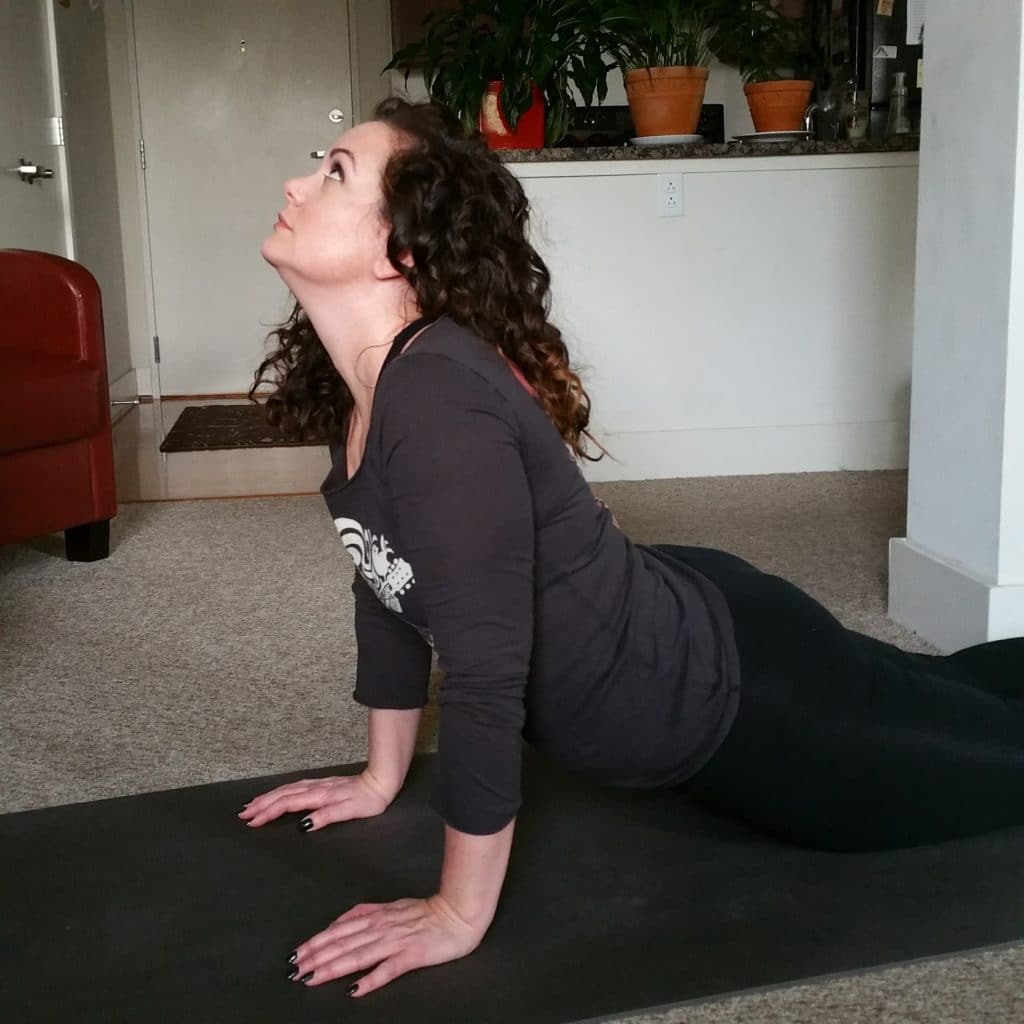
- Inhale and look up. You will feel a stretch through your lower back, shoulders, and neck.
- Exhale back into downward dog.
- Inhale your left leg forward between your hands into the low lunge. Look up and feel the stretch along your neck and chin.
- Exhale your right leg to step up and meet your left.
- Inhale your arms up over your head, looking up with a slight backbend. This is one sun salutation. Do this 2 or 3 more times to warm your body.
Benefits: Sun salutations are a full body workout and a complete yoga practice in and of themselves. They lengthen and strengthen your body and help with general toning. Sun salutations are a warm up for every other yoga pose or other exercise. - Kneel down and sit on your heels. Bring your forearms down to the mat. Clasp your elbows with opposite hands. Leaving your elbows where they are, release your elbows and clasp your hands to make a cradle for your head. Bring the top of your head into the cradle. Straighten your legs. Walk your feet as close to your head as you can. Breathe. On an inhale, lift one leg towards the ceiling. Hold for several breaths. Lower the leg and repeat with the other leg. This is the beginner headstand. Headstand is considered the king of yoga poses and, ideally, should be held for 5 minutes a day.Benefits: Headstand reverses the effects of gravity, giving the ultimate natural facelift. Some yogis claim headstands can stop hair from greying. Headstands help heal and prevent varicose veins. A headstand a day helps keep aging at bay.
- Stand at the top of your yoga mat. Step your right leg back and quarter turn. Reach your right hand down to your shin, ankle, or grab your big toe, depending on your flexibility that day. Your body is different day to day and morning to evening, so do not push past what your body wants to do. Lift your left arm up over your head and look up at your left thumb. Hold for 8 to 10 breaths in and out the nose. Repeat on the other side, then step your feet back together and face the front of your mat. Keep your belly button pulled toward your spine to engage your abdominals for entire exercise.Benefits: Toning and tightening the neck and chin. Toning and strengthening inner legs. Toning arms, shoulders, and abs.
- Step your left leg back behind your right about 3 or 4 feet. Engage your abdominal muscles, square your hips to the front of your mat, and roll your chin down towards your chest. Continue rolling down until your forehead is on your right knee. Bend your right need as much as you need to accomplish this. It’s important to have the forehead/knee connection. Keep your fingertips or hands on either side of your right foot for balance. Take short sips of air through your nose for 8 to 10 breaths. Roll up, reversing the way you went down and repeat with the left leg forward.Benefits: Stimulating the thyroid gland, boosting metabolism and working the neck and chin in the opposite direction of previous exercise and ensuing poses.
- Come down on to the mat, lying on your stomach. Keep your legs straight and grounded down into the mat. Pull your belly button away from the mat, towards your spine to engage your abdominal muscles. Bring your palms flat on the mat under your shoulders. Without putting weight into your arms, lift your chest off the floor and look up.
Benefits: Tones neck and chin. Strengthens back and legs.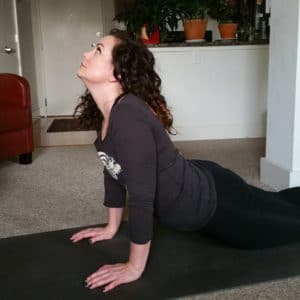
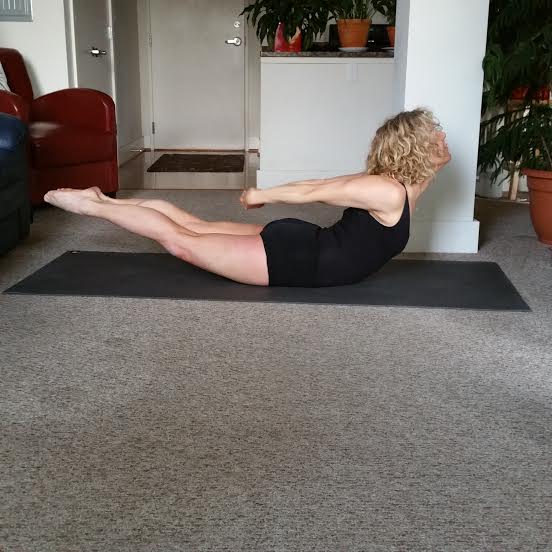
Jennifer in cobra pose. Make sure to pull your shoulders down away from your ears in this posture. - Clasp your hands behind your back. Keeping your arms and legs as straight as possible, lift your clasped hands while simultaneously lifting your straight legs squeezed together. Hold for 8 to 10 breaths, or as long as you are able without allowing your body to slacken.
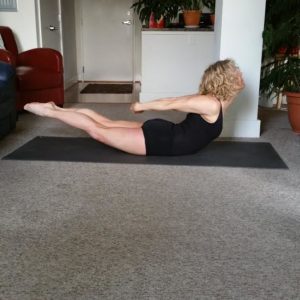
Locus pose tones neck and chin. Benefits: Toning and tightening neck and chin. Developing flexibility in the back.
- Come on to your knees with your knees separated about 8 to 10 inches and your feet slightly closer together. Bring your hands to your lower back to support your back. Press your hips forward. Bring your right hand down to your right foot and then your left hand down to your left foot. Keep pressing your hips forward and drop your head back. Take 5 or 6 breaths. To come out of this position, bring one hand back up to your lower back, and then the other hand so that you are supporting your back as you move out of the position. Fold forward into child’s pose for several breaths.Benefits: Toning and tightening neck and chin. Developing flexibility in the back.
- Lie on your back. Lift your hips and booty off the mat and support your lower back with your hands. Bring your legs up into a shoulder stand or back behind your head into a plow position. Be very careful not to have weight on your neck. Let the weight rest in your shoulders, upper back, and hands. Breath for long inhalations and exhalations through your nose.
Benefits: Inversions (feet above head poses) bring increased blood flow to the head, brain, scalp, face, and hair follicles. Builds strength and determination.